Friday 15 June 2012

Jubilee Garden Party Part 4

“I am thankful for the mess to clean after a party because it means I have been surrounded by friends.” - Nancie J. Carmody 


Though the Diamond Jubilee is now a distant memory (and this post is slightly late!) – blame it on the long weekend and a week of holiday – fear not, we have not forgotten! This is our final Jubilee post where we show you how we transformed our ideas on paper to over-all pretty (well, we think so at least!). 

Thanks to the wonderful English summer, our Jubilee Garden Party was a lot less ‘garden’ than we had planned. Luckily we didn’t let that dampen our spirits – we opted for plan B and moved the party indoors. 

I always forget how much work goes into hosting a party – food preparation (is there going to be enough?), decorating (will anyone even notice the miniature food flags?), more food prep (how hungry will everyone be?), drinks (is there such a thing as too much wine?), ding-dong (the guests are early!). 

But as the quote above so nicely puts it, all of the planning and preparation is worth it if you’ve celebrated with friends. And celebrate we did… 

Before we share a few of our favourite pics from the day, a huge ‘we-appreciate-you-so-much’ shout-out must go to our wonderful (long-suffering) husbands. Thank you for cutting, slicing, pouring, hanging, dicing and hosting with us. We couldn’t have done it without you both (we know you secretly enjoyed it all!).

The food...


The drinks...


The decor...


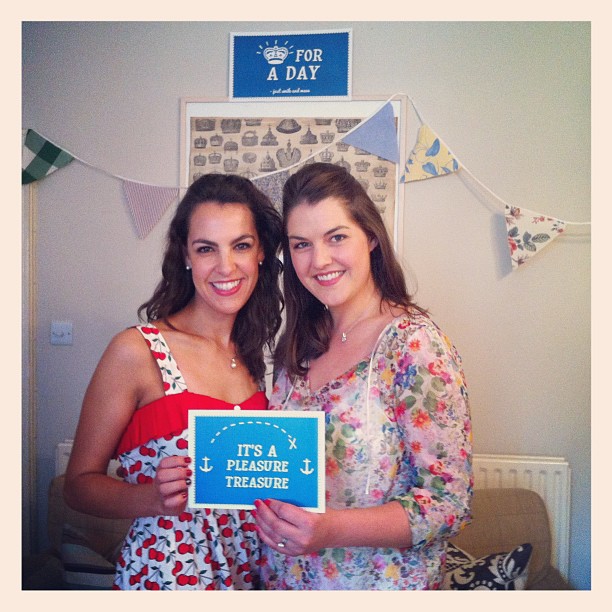
The photobooth signs made by the very talented Roxy Sayer...


Did you have as much fun as we did? 


Sunday 10 June 2012

The Perfect Present - The foodie edition

Some people are just great at sourcing the perfect present - weddings, birthdays and hen parties - they have it in the bag!

For others – not so much. I have been known to get into quite a panic scouring the high street to find something original, different and lovely. We’ve all had that moment of buying something that sits on a shelf, never gets used, worn or loved… so, needless to say, I am always on the search for the perfect present.

Today, I opened the post box to reveal the most divine, unique and PERFECT (for a dedicated foodie like me), wedding present.

To give someone special their own olive tree visit the Nudo website!

We are now the proud adoptive parents (for the next 12 months anyway) of our very own Olive Tree! Our tree, Leccino (after his olive variety), lives in a grove called Il Professore on the Eastern Coast of Central Italy.  Not too shabby! I think a visit is a must – wink wink hubby!

The upside of this pressie is that it benefits us food lovers and supports the smallscale artisanal farmers who produce the olive oil.

The cherry (or should I say olive) on top is that in exchange for being his adoptive parents, we get two deliveries of olive oil from our little Leccino. In spring, we will get extra virgin olive oil and in autumn, we will get three tins in a range of flavours from lemon to chilli.

Bring on the alfresco evenings, crispy ciabatta and Nudo olive oil from our little Leccino! Buon appetite!

Grazie Jess and Ryan for the perfect present! 

Keep an eye out for our top 10 favourite foodie gifts coming soon!


Monday 28 May 2012

Jubilee Garden Party Part 3

What is a party without a puffy paper pom pom? 


When I was planning my own wedding I spent many, many hours poring over inspiring blogs with creative ‘how-to’s’. It made me want to DIY everything – stationery, food, décor, my veil. I was constantly amazed at the perfect Martha Stewart-esque weddings created from nothing but tissue paper, coloured card and double-sided tape! 

Of all the DIY tutorials I came across, the tissue paper pom poms were my favourite – so light, so fluffy, so dreamy.

Sadly I didn’t end up making these for my wedding (the most I DIY-ed was the labels for our favour table – my brilliant mum and mum-in-law did the rest!). 

Our Jubilee Garden Party has given me the perfect excuse to make them. The best bit? They’re easy peasy lemon squeezy! 

Note: Please excuse the fuzzy iPhone pictures - I can assure you that these look spectacular in real life!


How to make: Tissue Paper Pom Poms 

Step 1: 
Lay 12 sheets of tissue paper flat on the table (most tutorials suggest eight, but I think 12 gives you a fluffier result!). Make (roughly) 3.5cm wide accordion folds, creasing with each fold (so it looks like a fan). 


Step 2: 
Cut a (roughly) 30cm piece of steel wire or florist’s wire (I used garden wire because that’s all I could get hold of!). Then fold your accordion-folded tissue paper in half (to find the centre). Wrap the wire around the middle and twist it to secure it (tightly, but not so tightly that it rips). Wrap the ends of the wire so it creates a loop. 


Step 3: 
Using a sharp pair of scissors, trim the ends of the tissue paper stack (into either round or pointy shapes). I personally prefer pointy. 


Step 4: 
Lay your pom pom on a flat surface and very gently separate the layers – the tissue paper tears easily, so be patient. Pull it out from the bottom, as near to the wire as you can get. 


Step 5: 
Tie a piece of clear fishing wire or ribbon onto the hook and hang it from the ceiling. Ta da!


Friday 25 May 2012

A Friday First

Fridays are our absolute fave and this Friday is no exception. 

Today we are so excited to present you with a little sneak peek of our very FIRST real wedding post from the lovely Michelle. Yes we are officially doing a happy dance!

Surrounded by their favourite people, our beautiful bride walked down the aisle to marry the man of her dreams, in their hometown of Harare in Zimbabwe. 


Michelle created this adorable Love Story for each guest to read in the chapel - which we absolutely love. Keep a look out for Michelle and Marc's wedding post (and lots of planning tips and details) which will be online soon! We can't wait to share it with you!

Wednesday 23 May 2012

Jubilee Garden Party Part 2

"After all, what is your host's purpose in having a party? Surely not for you to enjoy yourself; if that were their sole purpose, they'd have simply sent champagne and women over to your place by taxi." - P.J. O'Rourke


This week we created our guest list (hand-picked for their scintillating conversation and general loveliness - but mostly for their photogenic features... they are going to appear on the blog after all!) and sent out our invitations.

We've included a few of our favourites below if you are still looking for some invitation inspiration:


Above left: The Queen's Diamond Jubilee Tea Party Invitations (free printable) via the lovely Lyndsay at All Things Handmade
Above right: Bunting Party Invitations via notonthehighstreet.com
Bottom left: Jubilee Modern Vintage Designs (Iris Art Designs) via Folksy
Bottom right: Prepare to Party (Really Good Card Company) via John Lewis


And finally, the "green" version we sent out using Paperless Post. Fit for a Queen (or at the very least, a Duchess)!


Monday 21 May 2012

Good treats come to those who wait...

Tonight I bring you another recipe from my lovely mum. 

This is a true labour of love - it took me a good few hours to make these babies on Saturday. The actual recipe is a breeze and you can mix up the dough and make the icing in half an hour - it's the rolling of the dough into 170 (yes, 170!) little balls that is time consuming.

But believe me when I tell you that these melt-in-the-mouth biscuits are worth the effort. If you've got a bit of time on your hands (and have a few episodes of Smash to catch up on), then do yourself a favour and get rolling!

I think these are a great idea for gifts and they would make sweet party favours (if you can possibly allow yourself to share, of course!).


Custard Biscuits

Biscuits:
340g (375ml) butter
100g (200ml) icing sugar, sifted
5ml vanilla essence
325g (625 ml) cake flour
175g (350ml) custard powder
20ml baking powder
Pinch salt

Butter icing:
250g icing sugar
125g butter
5ml vanilla essence

Biscuits method:
  1. Pre-heat oven to 180C. Cream the butter and icing sugar together.
  2. Add the vanilla essence and mix well. Sieve dry ingredients together.
  3. Mix in with the butter and sugar mixture and knead to a smooth dough. Shape dough into even size round balls (slightly bigger than a big pea). 
  4. Place on a greased baking sheet and press down slightly with a fork. Leave enough space between dough balls for biscuits to spread and rise.
  5. Bake for 10-12 minutes or until straw-coloured and crisp. 
  6. Remove from oven and leave to cool on baking sheet.
Butter icing method: 
  1. Beat the icing sugar, butter and vanilla until light and fluffy. The longer you beat, the lighter and fluffier the icing will become.
Sandwich biscuits with butter icing and enjoy. 

Saturday 19 May 2012

South Bound Inspiration


We are so excited to announce that one of our favourite bloggers Gaby (originally of Cap Classique) who has just launched her gorgeous new website South Bound Bride will be featured on It's a Pleasure, Treasure soon! Yes, we said it! 

Gaby, who is originally South African, has lived in London, Milan and New York. As well as inspiring us all with her blog, she is also freelance editor. Gaby has been keeping brides, both in SA and abroad, in the know since 2010 showcasing weddings, venues, providers and sharing with the world the beauty of South Africa. We are officially big fans, and Gaby's Cap Classique was a bible for us when planning our weddings from afar. 

Watch this space... but until then skip on over to South Bound Bride and be inspired!